|
Once the rear seat spring unit was secure and the padding was securely attached to the body the right and left sides of the interior needed to be covered. Originally Shields Carriage Company used a heavy industrial cardboard (a solid cardboard back panel like used today as the backer on a paper tablet but perhaps 3 times as thick) as the backer for the leather covering. The original cardboard was obviously not able to be reused (the animals had eaten a lot of it and other sections were heavily water damaged) so a two-ply construction using 1/16" thick vulcanized fiber was decided upon. A side from a large cardboard box was cut to serve as the template. Then the cardboard template served allowed four identical panels to be cut from a sheet of vulcanized fiber. One surface of each of the vulcanized panels was coated with contact cement and then two panels were placed together to form a single panel. When the contact cement had dried the panel was trimmed as required for the best fit and then stapled in place. By selecting vulcanized fiber and laminating it to be 2-ply the interior sides were made stronger then they had been originally.
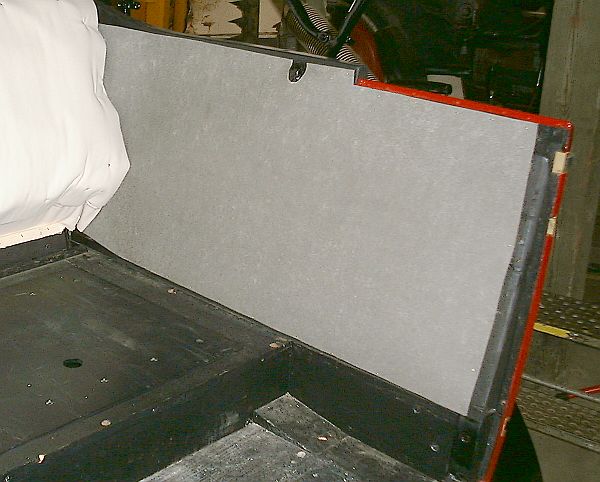
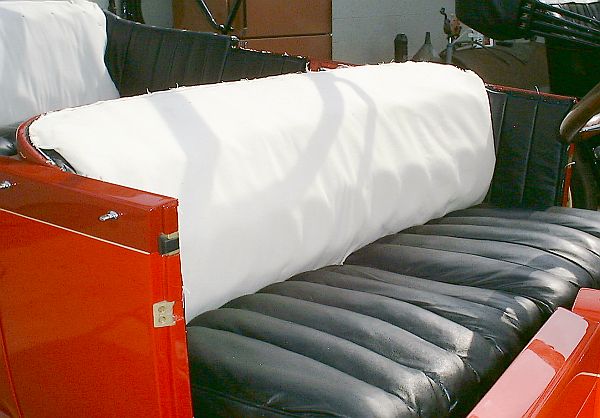
In the above photograph the side panels have been installed. Each panel was stapled along the bottom edge into the 1/2" x 1/2" nailing strips. Then the panel was stapled along the top edge and finally down the side next to the door. A piece of leather covered vulcanized fiber covers the panel's lower edge and the wood below the panel. Originally a half-round, sewn-on leather covered, lead filled tin molding with nails embedded in the lead served to cover the top leather edge of the panel. Those were in bad shape and as replacements were not available from any restoration supplier the use of wire-on was the closest thing that could be used as a replacement. Also shown in the above photograph is the finished seat cushion. The seat back leather covering has yet to be stapled in position (to top edge can be seen). The seat back leather covering was stapled to the tacking strip along the bottom and then the panel was pulled tight and fitted along the top edge.
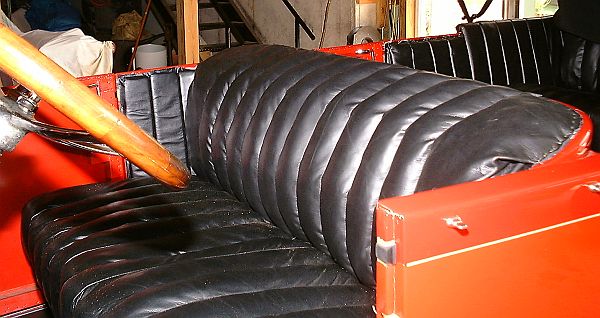
The photograph above shows the rear seat area nearly completed. The seat back as well as the rear panel of the top have been stapled in place. The wire-on has yet to be stapled in position and the two wings of the top rear panel have yet to have eyelets for the common sense fasteners installed. The wing panels attach to common sense fasteners along the outer edge of the car. The common sense fasteners will be installed after the wire-on is installed. In the lower right corner of the photograph is a short section showing the detail of how the front seat back has been stapled to the wooden frame of the seat back. The same was done for the rear seat back. Also seen in the photograph is the leather covered metal strip and the lower edge of the seat cushion. The strip holds the seat cushion in place on the seat box which also doubles as a storage area.
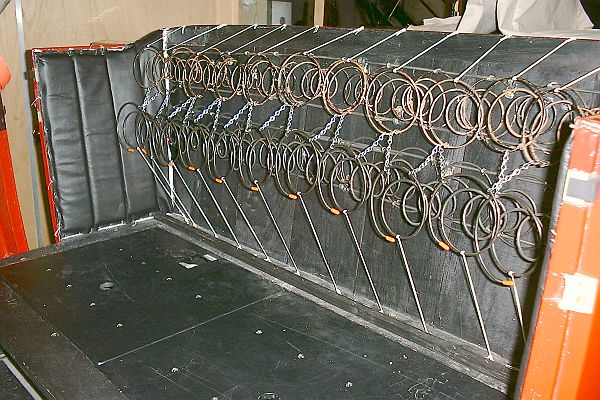
The front seat back was installed similar to the rear seat back but somewhat different that what Shields Carriage Company had done for Stanley. First the springs were replaced. The original springs were badly pitted and rusted from being in contact with animal urine and waste. Rather than have a spring break after the seat was together they were all replaced. The original springs were simply slipped in a burlap strap that ran across the rear of the wooden surface. To provide a more positive mounting a wire frame was made up similar to that which Shields had fabricated for the rear springs. Because the springs could not be 8-way tied the springs were tied together in an X using chains. Beeswax impregnated cord was then used to tie the springs to the frame. Next the duck cloth and felt panel was installed and stapled in place.
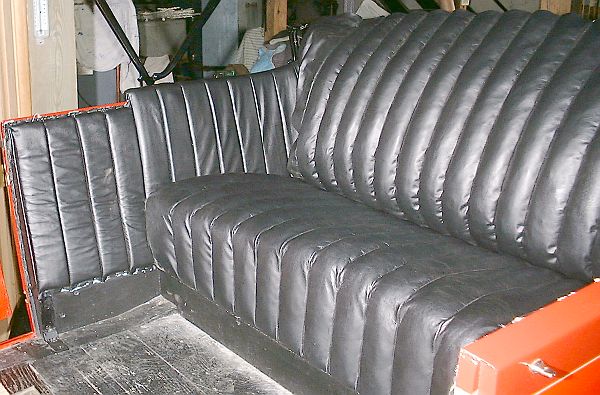
The seat cushions are complete in the above photograph and the front seat back padding is in place. Both of the interior side panels have also been installed using the felt filled leather over 2-ply sheets of vulcanized fiber. Only the front seat back leather covering remains to be installed. Once the leather covering is installed the wire-on trim will be stapled in place.
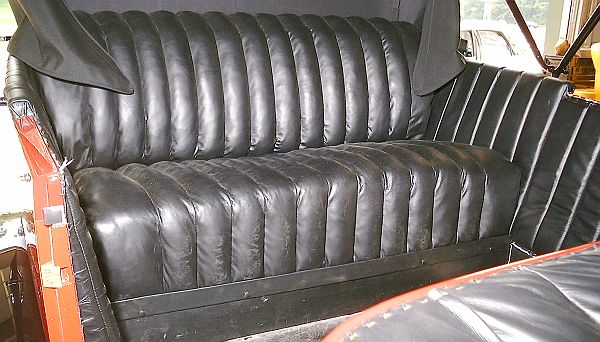
The front seat area with the exception of the wire-on trim is complete in the above photograph. Mounted to the exterior of the body, near the top of the body line, at the lower right corner in the photograph above are two common sense fasteners that will be used to hold the side curtains in place. An eyelet in the side curtain slides over the common sense fastener and then the fastener's top section is turned 90-degrees which captures the eyelet and holds it in place. Next the door panels need to be installed along with the remaining trim. |