|
It had to happen sooner or later ~ I'd screw up the finish on the body somewhere, someplace, big-time. The spring unit for the back seat is supported on lumber strips going between the wooden upper and lower body frame boards. Three boards were used originally and I decided that since the spring unit had bent that two additional support boards would provide better support. The five boards were cut and had their ends tapered to match the angles they would be installed on ~ each board slightly different from the rest. To avoid a lot of hammering on the body I borrowed a pneumatic nailer for toe-nailing the boards to the frame. I thought I had the angles right and the nails short enough (and I still contend the hard oak grain bent the nails) however the nails went through the frame and into the aluminum body. Definitely an "oh shit" of major dimension!!
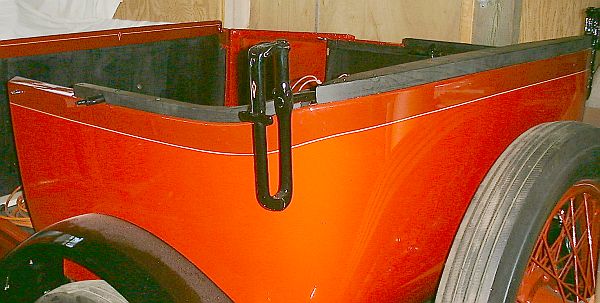
As it turns out once the kerosene tank and spare tire mounts at the rear of the car were removed to gain clear access to the two places requiring repair an eight inch crack was also discovered in the body filler over the left rear wheel. The result was that all three places were repaired but the complete rear of the car ended up being repainted since that would be easier to do that to try and spot match the repaired area color to the remainder of the body.
Pictured above are the five supports for the rear seat back properly nailed in place ~ after the body had been repaired. Also shown are the supports along the right and left sides of the body for the side panels. It is difficult to make out the detail but the horizontal supports along each side are just above the recesses into the body for the rear wheels. The 1/2" x 1/2" square strips are where the backing panel and eventually the leather coverings will attach. Also present in the photograph above is the opening where the car's battery is located (the metal strap clamps the battery in place on its holder).
As mentioned in the discussion on removing the car's interior, a set of three nailing strips follows the car's upper body contour. To these strips is tacked the canvas and felt covering, the leather seat covering, the top material, and finally a decorative trim strip to hide the edges of all the materials fastened at the top edge of the body. Seen in the photograph above are the three replacement strips, painted flat black, and screwed in place. I had thought that once the new strips were in place the originals that were saved to serve as templates for making the replacements might turn up. At this point they are still missing in action.
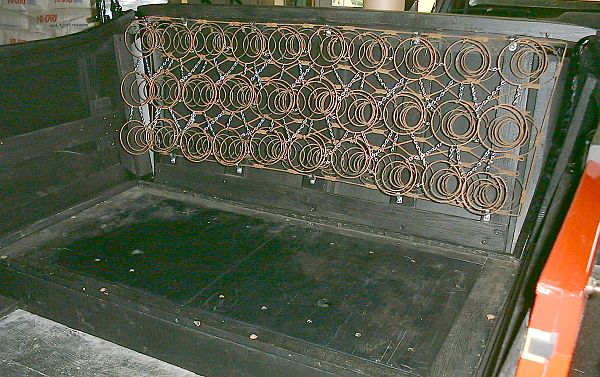
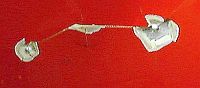
The springs of the rear seat back spring assembly were fastened to a wire frame where the frame rested on the support lumber. The surface of the spring assembly that contacted the seat felt and leather was 8-way tied using chains; no wire frame was used as was the case for the seat cushion spring units. As seen in the photograph all of the chains were replaced as most were either missing or had rusted badly. At the time the car was purchased this spring unit would float free behind the rear seat back leather. Removing the rear seat cushion allowed the spring unit to fall out of position. The springs were in direct contact with the leather seat cover. Based on the construction found for the front seat and the cushions the same construction was probably used for the rear seat. Also shown in the photograph above are the new wooden panels that cover the storage area under the rear seat cushion. While the front seat still had its "picket-fence" cover the rear seat area only had individual yellow boards that had been cut and used as replacements.
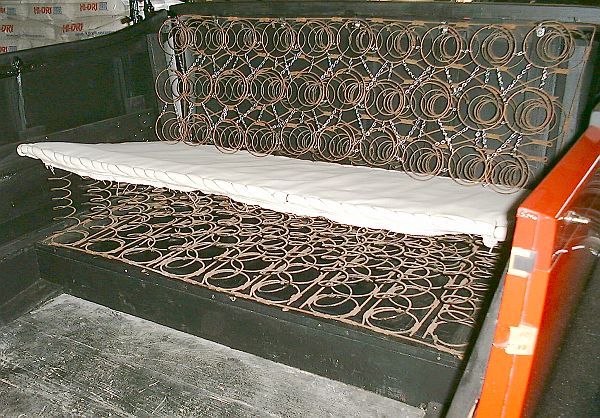
An important part of the placement of the rear seat back spring unit was its position. Shown above is both the seat bottom and seat back spring units in position. Once the position of the seat back spring unit was determined it was secured using rubber lined pipe clamps to attach the spring unit's frame to the supports.
While the springs in the center of the rear seat back spring unit could be 8-way tied to the surrounding springs, the perimeter springs of the spring unit could not. These springs were sewn to the duck cloth covered felt covering. When the covering was tacked in place the covering effectively provided the remainder of the 8-way tying necessary. Pictured above is the felt pad covering in place over the rear seat back spring unit. Disassembly of the front seat indicated that Stanley had probably used burlap over the springs followed by a layer of hemp or jute padding and finally a canvas covering. The padding would have been held in place using small tacks. The use of tacks requires a lot of hammering on the car and was something I didn't want to do (not to mention perhaps turning my fingers into a bloody mess trying to hold and start each tack). A pneumatic stapler was available for the project and I'm glad I went with it. It allowed me better control of the material being installed before I fired a staple in place. The staples selected were #17 gauge, 1/4" wide, and of varying leg length. For holding the duck cloth in place a 3/8" leg staple was fine. For the leather a 1/2" leg staple was selected. By the time the top material was stapled in place at the rear of the car a 5/8" leg staple was used as it had to penetrate the leather and duck cloth before taking hold in the wood. The pneumatic stapler did have to be properly configured for the staple length being driven and the wood that the staple was being driven into. There were major adjustments required between stapling into the 1918 oak frame verses stapling into the 2005 pine. Too much air pressure and the staple would cut right through the leather or cloth being fastened. For many areas the pressure was set light so that the staple did not drive all the way tight to the material being fastened. After stapling a 3/8" diameter, flat end, pin punch was set on the staple and a couple light blows with a hammer set the staple "home".
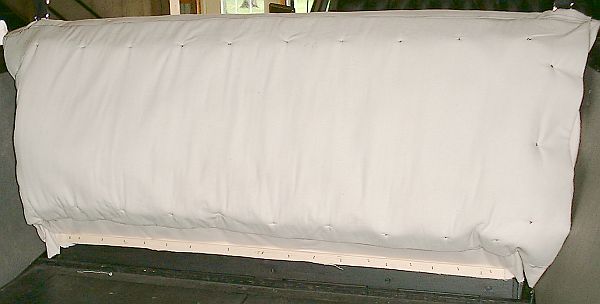
Pictured above is the duck cloth for the felt padding stapled in place across the rear of the car. Also shown are the pair of straps that hold the rear bow in position. Tee-nuts were placed in the nailing strip before it was screwed to the rear body frame of the car. Short bolts to the D-rings held the D-rings at the proper height above the surface of the leather. Later, when the rear panel for the top was ready to be installed the two straps would be cut to length and sewn together to provide the proper tension to the top. |
 This would perhaps not have been a problem had the animals not used the
rear corners of the car as a restroom and the acids of their body wastes
hadn't eaten through the aluminum. Both lower rear corners were
filled with body fuller. As you might expect the filler popped out
leaving quarter-size holes in the rear finish. Both rear corners ~
where the end support boards were located ~ popped body filler. The
only path forward would be to have the two spots repaired. This
would definitely delay the restoration project.
This would perhaps not have been a problem had the animals not used the
rear corners of the car as a restroom and the acids of their body wastes
hadn't eaten through the aluminum. Both lower rear corners were
filled with body fuller. As you might expect the filler popped out
leaving quarter-size holes in the rear finish. Both rear corners ~
where the end support boards were located ~ popped body filler. The
only path forward would be to have the two spots repaired. This
would definitely delay the restoration project.