|
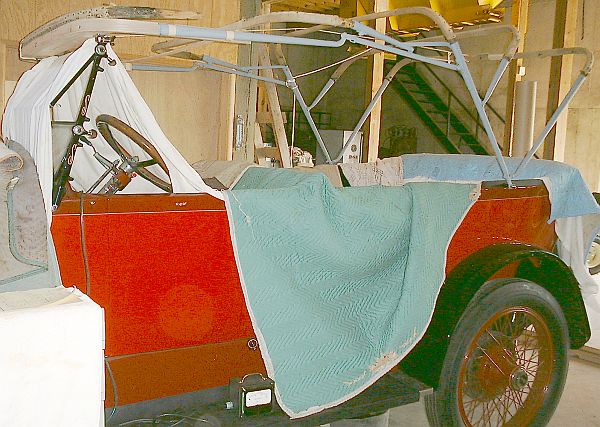
Pictured above the new front bow, the bow which attaches to the windshield posts has been taped in place to the bow socket (the two masking tape bands hold the bow's legs to the end of the bow socket). Resting on top of the new front bow is the original bow. The top bow socket ahs been positioned where it would be if the old bow were being reused. This is to insure that the top bow sockets are positioned properly for the proper look of the top. The original bows have been place in the restored top bow sockets to insure that the proper contour of the top results. A cord holds the last bow in position.
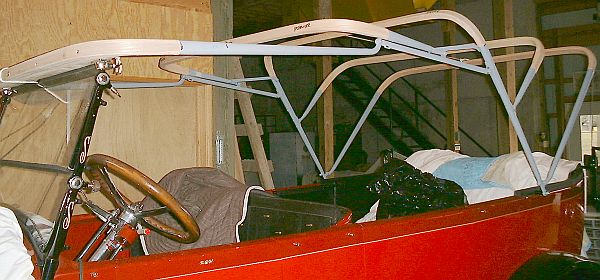
Once all the bows have had their legs tapered they were inserted in the top bow socket. Pictured above, all bows have been completed and the contour of the top is checked. With this step complete the bows could be removed from the top bow sockets and the top bow sockets painted Imron Gloss Black.
The photograph above doesn't do justice to the problem just discovered. The mechanical restoration of the car presented a number of challenges. The mechanical challenges paled to some of the ones that appeared during the restoration of the body and now the top. While the top bows were loosely sitting in the bow sockets the bows were put "down" to see how things fit in the top bow holders to either side of the car. It now became readily apparent why Marvin Klair refrained from raising and lowering the car's top ~ the rear bow didn't fit the bow holder! The bow holders at the rear of the car are designed such that when the latch is released the outer half of the holder folds away from the car. The top bows can then be dropped into the holders with ease (or at least that is the intent). When the bows and sockets were put "down" the rear bow sat very wide in the bow holder. It was possible to latch both bow holders but in so doing a lot of pressure was being applied to the bow sockets. Now it became perfectly clear where the kinks had come from on the bow socket tubes! Perhaps the only reason the tubes didn't kink easily this time was that they were filled with epoxy thus adding to their internal strength!
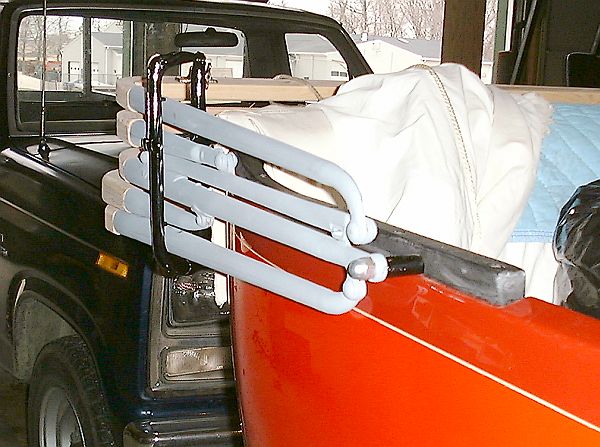
Careful examination of the photograph above and the lowest bow (#5 is written in the center of the bow) shows that the center of the bow is curved outwards away from the car body. In clamping the top bow sockets in the bow holders the rear bow had literally "bowed" out to relieve some of the stresses. Rick's questioning of the bow's width, the kinks in the bow sockets, and Marvin commenting that the top was a problem to raise and lower explains why the top remained up for three decades and the top fabric had become inflexible! The question now became how to correct the problem. Obviously 1-1/4" of width needed to be removed from the bow. One solution would be to have a new bow made however Rick was now in California and would not be back to Pennsylvania for several months. Another individual could be found that made bows and a replacement bow of the proper width fabricated. All this would take time. The solution was to cut the bow and remove the 1-1/4" of length. The bow could then be drilled for dowels and using today's modern wood glues it could be glued back together. There was a risk in this however. This is the one bow that has a lot of tacks/staples applied to it. There are three straps that run from the front to the rear bows and are tacked to every bow to set and maintain the proper spacing between bows. The back panel of the top is stapled to this bow followed by the top panel and finally a length of wire-on trim to cover the seam. The joint would have to be a good one. As a result, after the bow was cut, dowelled, and glued back together again either side of the joint was shaved down slightly. The joint was then wrapped with three ply of carbon fiber and epoxy. The carbon fiber and epoxy insured the joint would remain sound. The fiber would also be thin enough that the pneumatic stapler should be able to impale a staple through the epoxy fiber and into the wood.
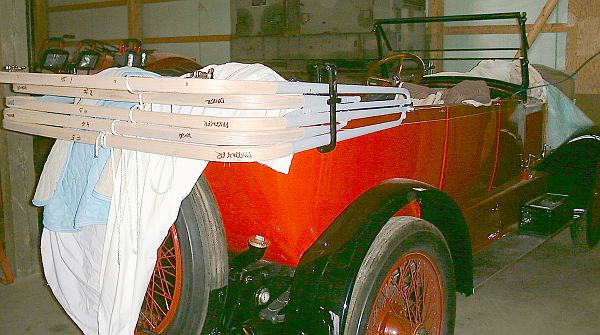
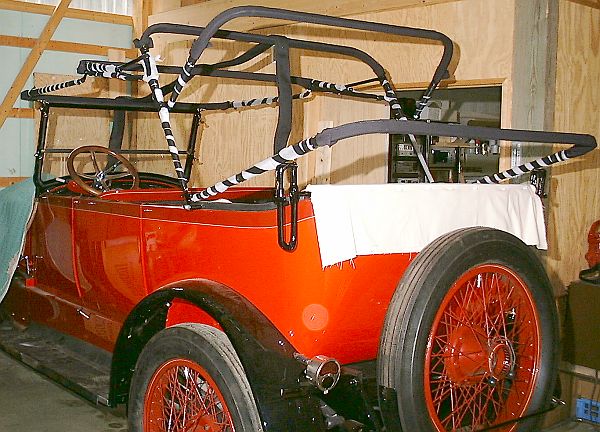
As seen in the photograph above the repair to the rear bow worked. The nice thing about the repair is that the bows would be covered with black duck cloth as shown above and thus the repair would be totally covered up. In the above photograph the top bow sockets have been painted and are covered with foam wrapping to protect the painted surface. The bows have also been covered, inserted in the bow sockets, and nailed in place. With the repair made to the rear bow the assembly would drop into the bow holders (the rear bow is seen in the above picture resting in the center of the bow holder). The wide black strap running from the center of the windshield, across the first bows, and hanging from the third bow is the 4" wide strapping material that will be stapled to each bow to set its position relative to the other bows.
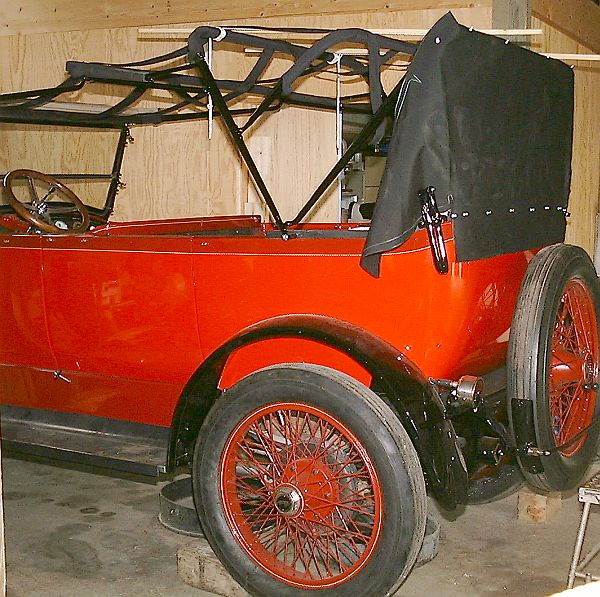
Held in place by push pins the rear panel of the top is fitted to insure that the position of the rear bow maintains the rear panel vertical. Two lengths of white rope tied to the third bow which has a fixed position pull the fifth bow forward and maintain tension on the rear fabric panel. With the fifth bow's position determined, the location of the fourth bow could be set to achieve the proper profile to the top using the wood sticks as reference. With these last two bows positioned the three bow straps could be applied from the front bow to the back bow and secured in place with staples.
The top contour is clearly seen in the above photograph. The top is in position and the next step is to apply the top material. While the three top straps pull the last bow forward, the two vertical straps maintain a downward pressure on the rear bow. The two one inch wide vertical straps are in place so that the rear fabric panel is not overly stressed by the tension of the straps pulling forward. |