|
The top for the car was essentially forgotten for most of the restoration process. It wasn't until after the car had been completely painted that the top became part of the restoration effort. The replacement of the top would be done along with the restoration of the interior of the car.
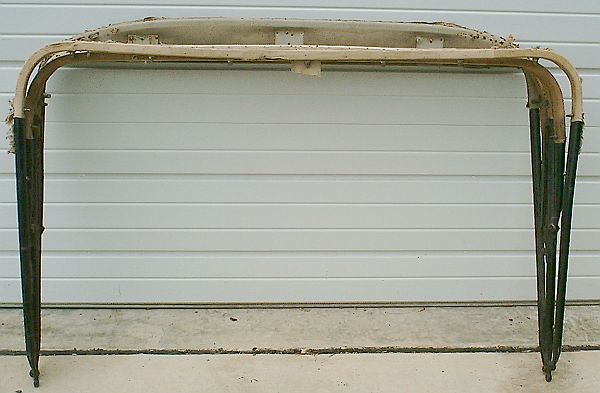
The first step in the top restoration was to carefully lay the top out on the pavement and unfasten the top material from the bows and top bow sockets (top bow sockets are the metal framework that the steam bent bows are supported by). Once the top was removed it was carefully rolled up and taken to New Castle Automotive Upholstery where a new one could be fabricated. With the bows and top bow sockets free of the top material they could be photographed and documented for the restoration process about to commence.
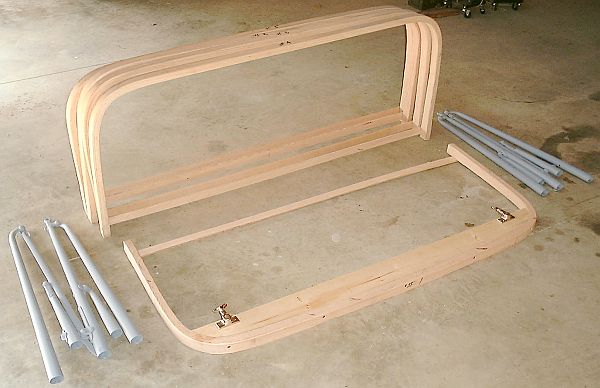
At the time the above photograph was taken it was not understood that it revealed a major problem with the existing top. The main bow and support that rests on the windshield posts is nearest the metal garage door in the photograph above. The three intermediate bows are next. In the photograph's foreground is the rear-most bow of the top ~ the bow that is at the rear of the car. Notice how the rear bow projects further to the "right" than any of the other four bows of the top. The same condition existed for the left side of the assembly in that the rear bow projected further "left" than any of the other bows of the top. The front four bows measured 57-1/2" from outside to outside while the rear bow measured 58-3/4" outside to outside. Unknown to me at this point was the fact that all the bows should be nearly the same!
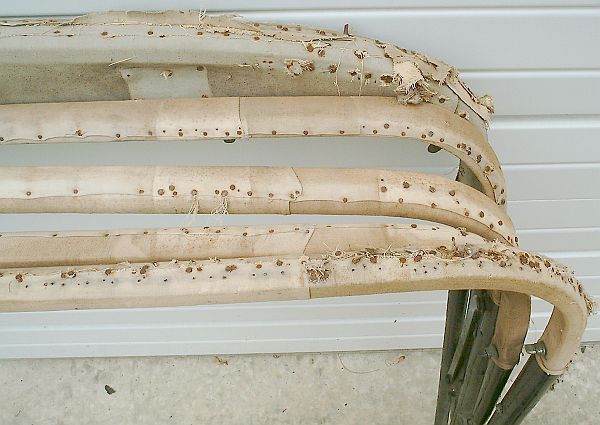
The oak bows are held into the top bow sockets pictured above with short nails. The holes right at the end of a bow tube were the ones that held the oak bow to the tube. The additional holes, especially the buck-shot appearance of the far right tube were from attachment of common sense fasteners for the side curtains and to hold the top material in place. Note the kink in the right bow socket tube. This tube is for the rear bow, the widest bow, of the top. It turns out this kink was another tell-tale sign of the problem with the top. At this point in the top's restoration the fact that a problem with the top existed had not been recognized. Once the nails were pulled that fixed the bows to the sockets the bows could be tapped out of the their sockets. The sockets were glass beaded and found to be in really poor condition. Body filler and paint were covering a myriad of problems. The bows had been repaired in the past with some soldering and brazing however additional years of exposure to moisture and the elements had severely rusted the tapered metal tubes from the inside out. The deterioration of the bow sockets was more than a little body filler could cover up and thus a more intensive restoration was going to be required. Without a major restoration the top bow sockets would not be structurally sound for use on the car. The sockets were shipped off to John's Enterprises in California for restoration. Once John Boorinakis reviewed the sockets he determined the existing tubes were definitely not serviceable and that they would have to be replaced. The original cast parts could be retained but new tubes would be fabricated and attached to the original castings.
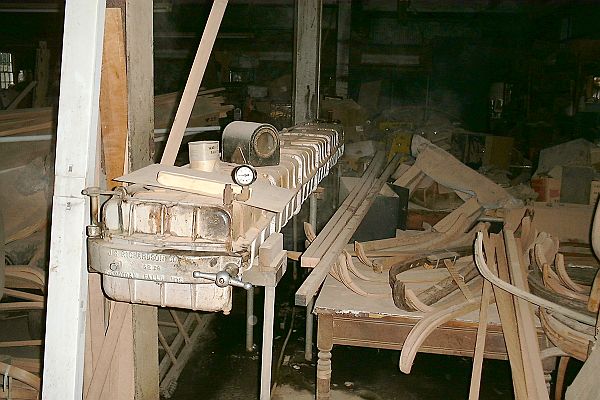
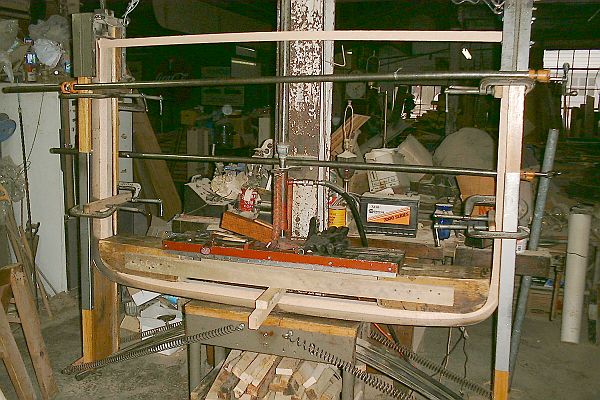
The bows for the car were steam bent by Rick Kessell of Oak Bows (also known as South Penn Restorations) in Chambersburg, Pennsylvania. Rick selects oak that is of the proper grain structure and growth for bending. The oak is cut to the finished size; for the Stanley bows 1" x 1-1/2" and long enough to make the bow from. In providing the measurements to Rick to make the bows from he questioned the width of the one bow. He made the observation that generally bows are all the same size or very nearly so and that one being 1-1/4" wider than the rest didn't make sense. As a result each bow was traced out on a roll of brown wrapping paper and the paper sent off to Rick for review. After Rick looked at the tracings he made the bows to my measurements which matched what Rick had determined from the paper tracings. He's never seen a top made in this fashion but it was obviously the way the top needed to be made. Each piece of oak that will be formed into a bow is individually placed in the steam chamber pictured above at a given temperature and steam flow rate for a specific amount of time that is determined by the cross-section of the bow. The steam acts to soften the wood and make it very pliable. Once the wood has softened in the steamer it is quickly removed and placed on the bow former.
A bow sits in the bow press pictured above. When the bow is initially placed in the press the two side panels are horizontal. The sides are then folded up to bend the bow to the contour of the wooden blocks which form the inside curved radius of the bow. To insure the legs of the bow are parallel they are clamped parallel as shown in the photograph. After the bow has had time to cure a wooden keeper is nailed between the ends of the bow's legs and the bow is removed from the bow press. The bow is then allowed to air dry for several days before any further work is done on the bow.
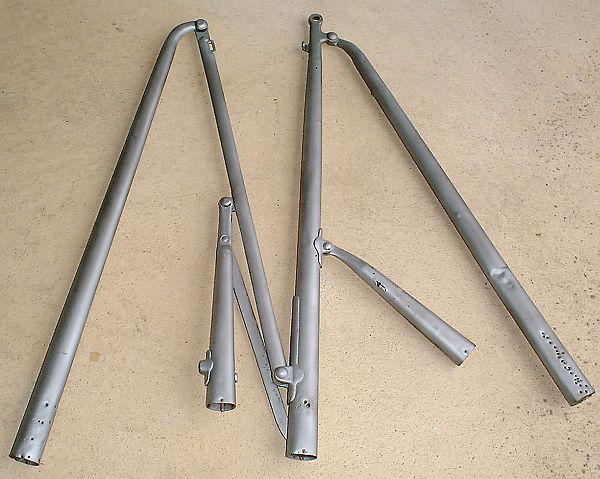
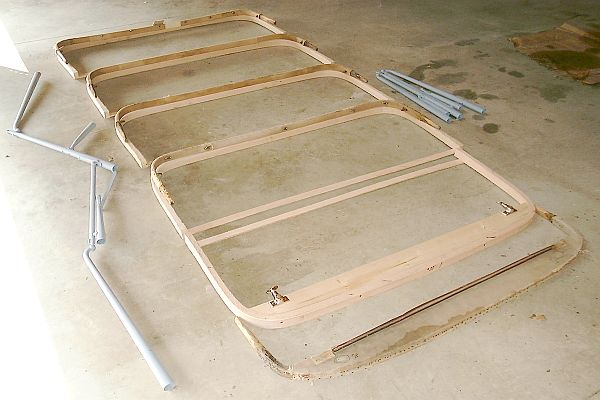
Pictured above are the five new oak bows for the top and the restored top bow sockets painted with primer. The 5/4" pine plate has been glued and screwed to the front bow and the two nickel plated clamps have been installed that fasten the bow to the windshield posts. The next step in the process is to lay match the bows with their original counterparts.
The original bows are resting on top of the matching new bow for marking of the original bow lengths and tapers. Note how the new bows match the original bows including the rear bow at the top of the photograph. Alongside one of the top bow sockets has been extended. The top bow socket tubes were filled with epoxy after fabrication to within 8" of the end of the socket. The addition of epoxy adds little weight to the bow socket assembly but provides a great deal of strength to the tube. Additionally by having each tube filled any fasteners for the side curtains or the top will hold better in the bow socket.
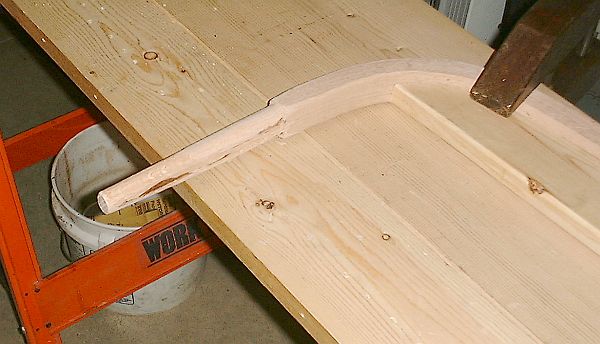
In preparing each bow the first step was to apply a slight radius to all edges of each bow using a router. Each bow was then sanded slightly to remove any roughness. Pictured above is the bow for the windshield and the 5/4" pine plate has been secured to the bow. Next each top bow is cut to the proper length and the end tapered to fit snugly in the bow socket tube. The tapering is started by making a sharp radius with a router. Very sharp wood chisels are then used to properly taper the oak bow to fit its designated bow socket tube. Each bow leg has to be individually tapered and fitted to its respective bow socket tube. |